In this tutorial I will show you how to create a Routed Network on QEMU/KVM libvirt with the virsh command.
With KVM Livirt there are three types of networks:
Types of Network
- NATed (Network Address Translation) virtual network: This type of network provides outbound network connectivity to virtual machines, allowing them to communicate with the outside world based on the network connectivity available on the host. However, outside entities will not be able to communicate with the virtual machines.
- Routed virtual network: This type of network allows virtual machines to communicate with each other and with external hosts by routing packets between different networks.
- Isolated virtual network: This type of network isolates virtual machines from each other and from the outside world, providing a completely separate network environment for each VM.
What is a Routed Network in KVM Libvirt?
A routed virtual network in KVM Libvirt is a type of virtual network that allows virtual machines (VMs) to communicate with each other and with the outside world by routing packets between different networks. In a routed network, each VM has its own IP address and can communicate directly with other VMs or external hosts.
In a routed network, Libvirt creates a virtual router that handles packet forwarding between the virtual machine’s network interfaces and the physical host’s network interfaces. This allows VMs to send packets to each other and to external hosts without needing to go through the host’s IP address.
To create a routed virtual network in KVM Libvirt, you need to define a network interface using an XML file that specifies the network configuration. You can then start the network using the “virsh net-start” command, and configure your VMs to use this network.
Routed networks are useful when you need to isolate multiple virtual machines from each other while still allowing them to communicate with external hosts or with each other. They are commonly used in server virtualization environments where multiple VMs need to be deployed on a single physical host.
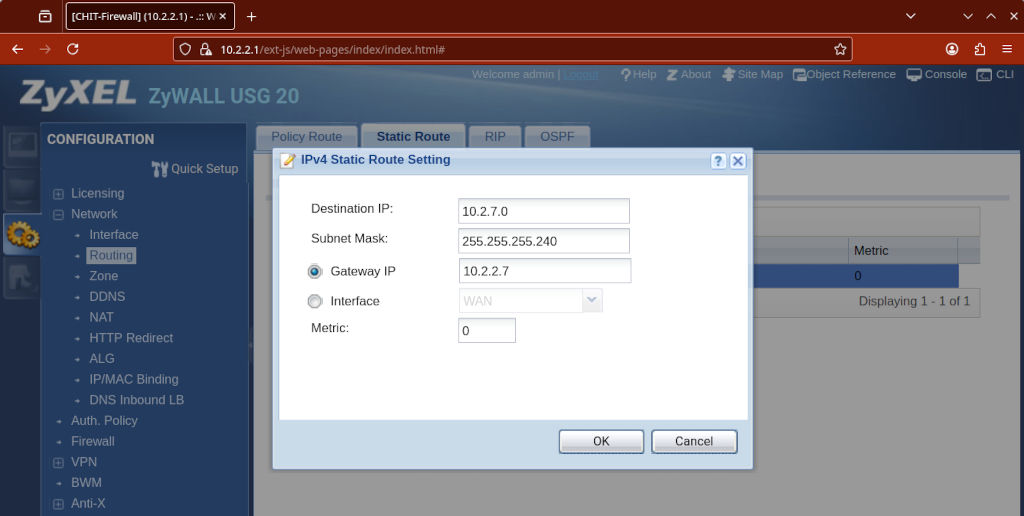
In a routed mode, the virtual network is connected to the physical network using the IP routes specified on the host. These IP routes are used to route the traffic from the virtual machines to the network. To be able to communicate with the guest with this configuration you need to set up a static IP route on your router so that reply packets are able to reach the hypervisor back, otherwise they will never reach the host.
How to create a routed network with the virsh command
To create a routed network with virsh you have to first create a file with the configuration, say, virbr1.xml.
<network>
  <name>virbr1</name>
  <forward mode='route'/>
  <bridge name='virbr1' stp='on' delay='0'/>
  <ip address='10.2.7.0' netmask='255.255.255.240'>
    <dhcp>
      <range start='10.2.7.3' end='10.2.7.14'/>
    </dhcp>
  </ip>
</network>
When you have the file you can run virsh net-define:
# virsh net-define virbr1.xml
# virsh net-start virbr1
# virsh net-autostart virbr1
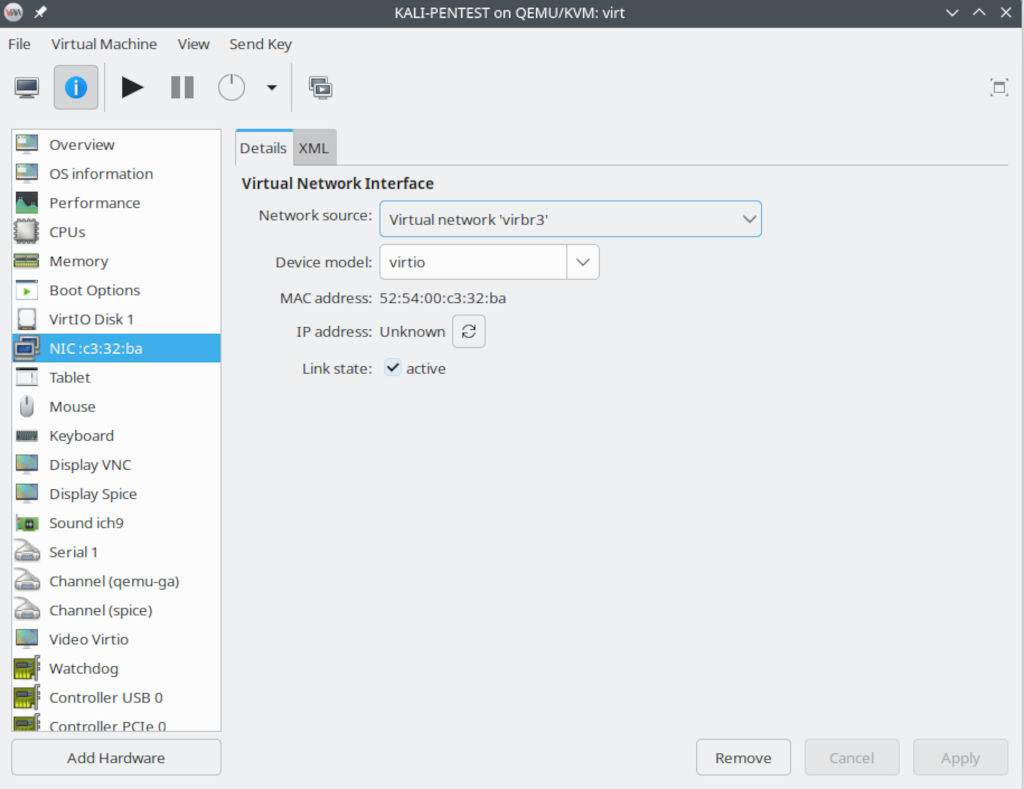
Once you created the network you can configure the virtual machine to use it.
Now, for the virtual machine to be reachable from the outside, you have to add a static route on your router with the IP Address of the host as gateway, usually under Routing and Static Route.