Protonmail is a good alternative to google gmail that can be used to send emails from your WordPress web-site. To do that you need a paid plan, in this example I am using Protonmail Plus.
To use Protonmail to send email in WordPress follow these steps:
- Connect your custom domain to Proton
- Create an e-mail to use to send emails
- Generate a token with the email you created
- Install and configure WP Mail SMTP to use Protonmail in WordPress
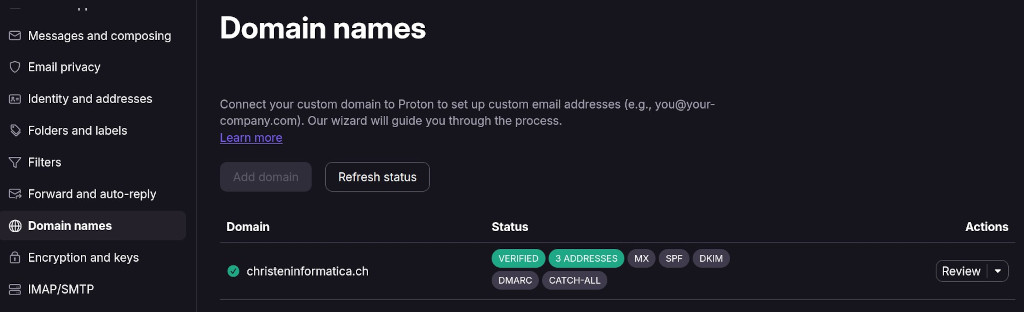
Connect your custom domain to Proton
To connect your domain to Proton to set up custom email addresses you click on the settings icon, All Settings, “Domain names”, Add Domain and follow the instructions.
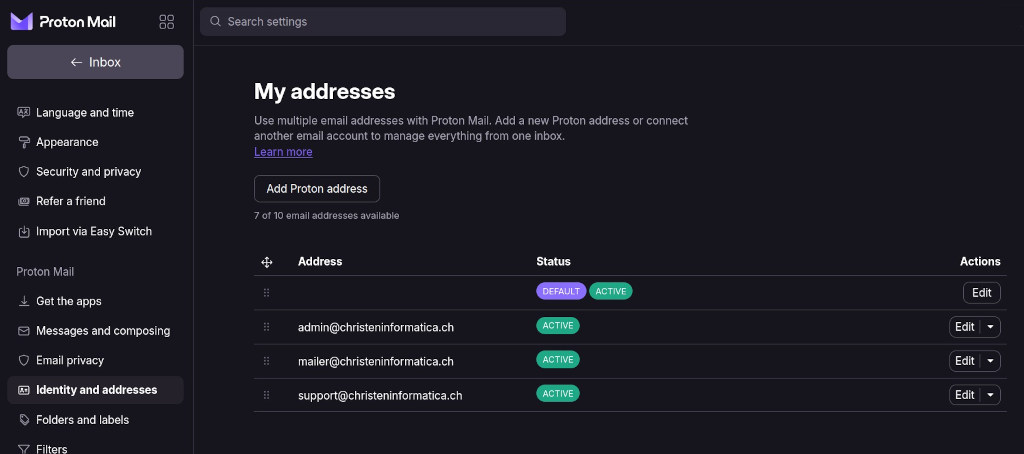
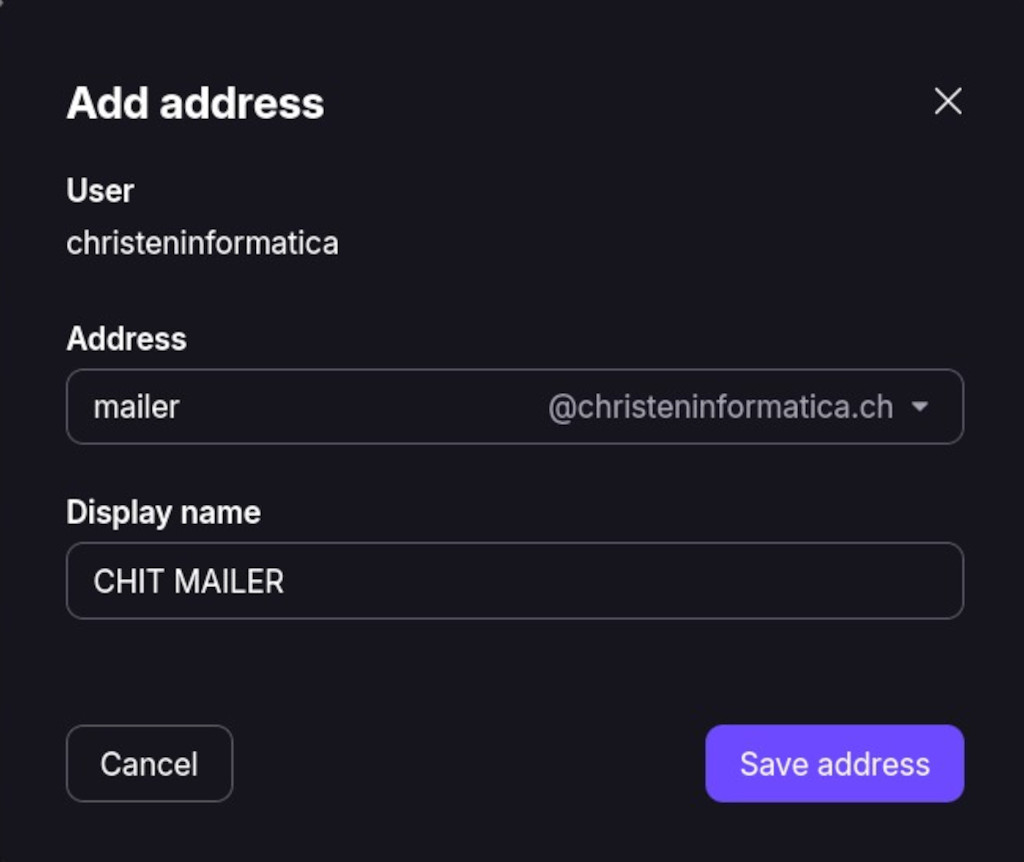
Create an email with your own domain using Protonmail
To create a new email with your own domain with Proton click on the settings icon, All Settings and Identity and addresses. Under My Addresses click on add Proton Address.
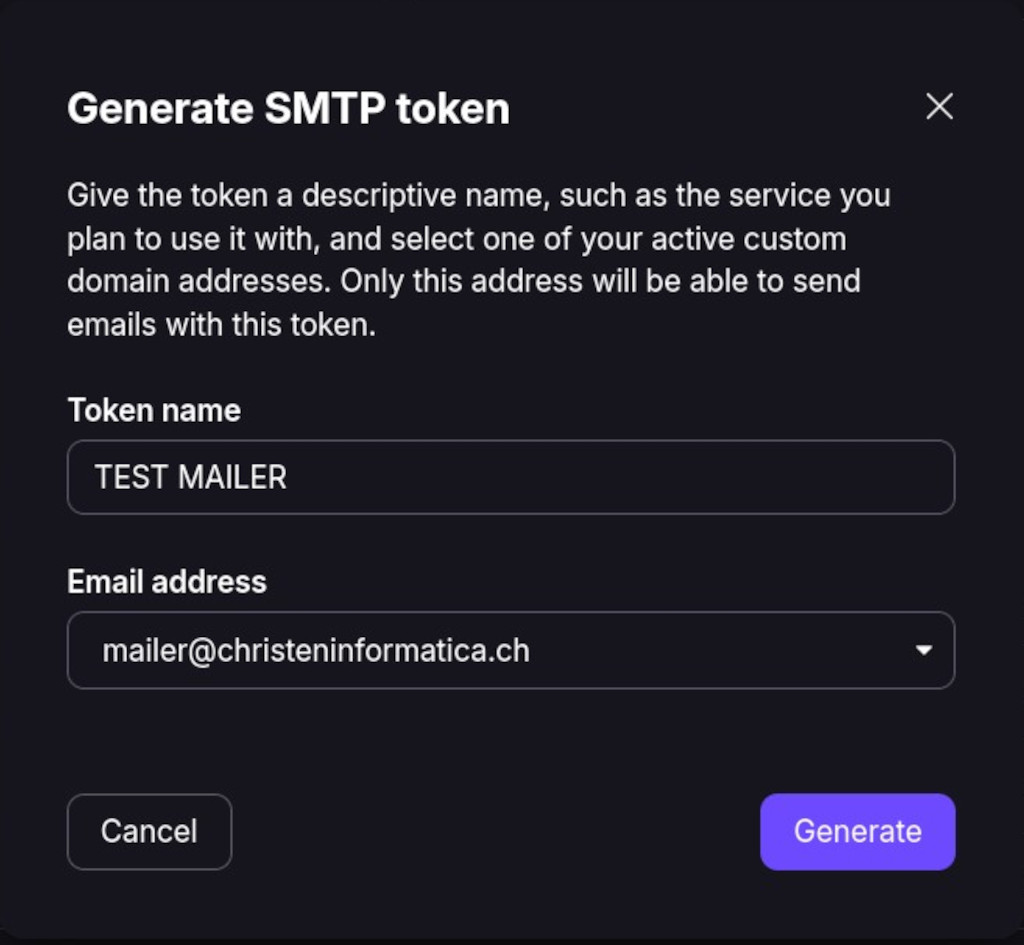
Proton SMTP Submission – Generate a token
To generate a token click on the settings icon, All Settings and IMAP/SMTP. In the SMTP Submission section you click on Generate token.
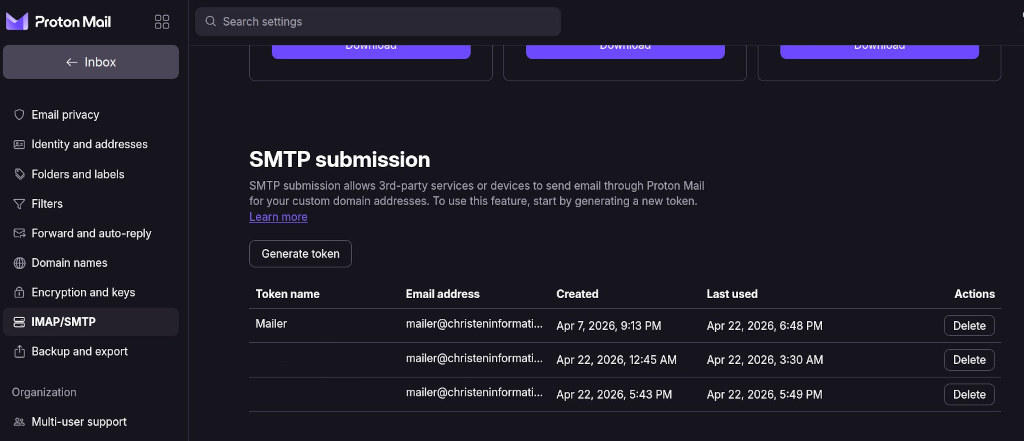
Once you generated a token you can use it as a password in the WP Mail SMTP plugins configuration.
WP Mail SMTP Configuration for Protonmail
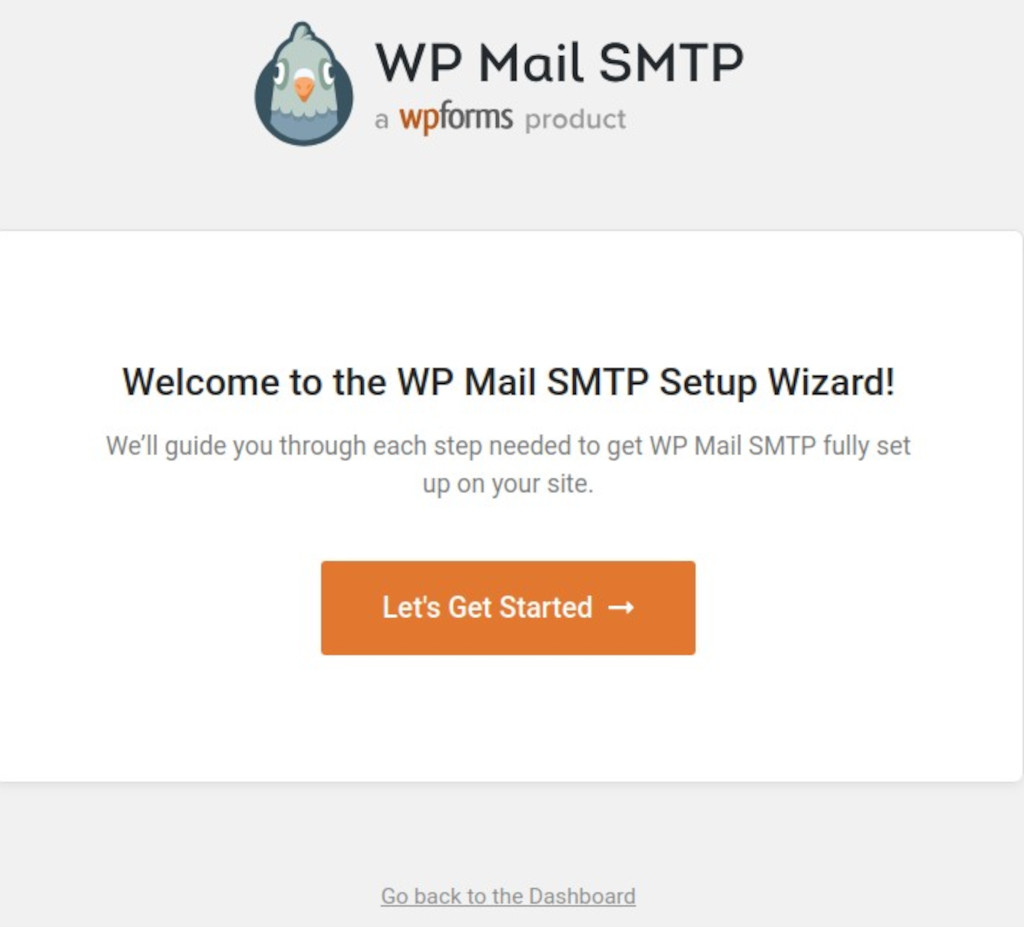
Download and activate the WP Mail SMTP WordPress Plugin. Once activated you can start the Setup Wizard.
Click on Let’s Get Started and follow the instructions. You choose other SMTP and click on Save and Continue.
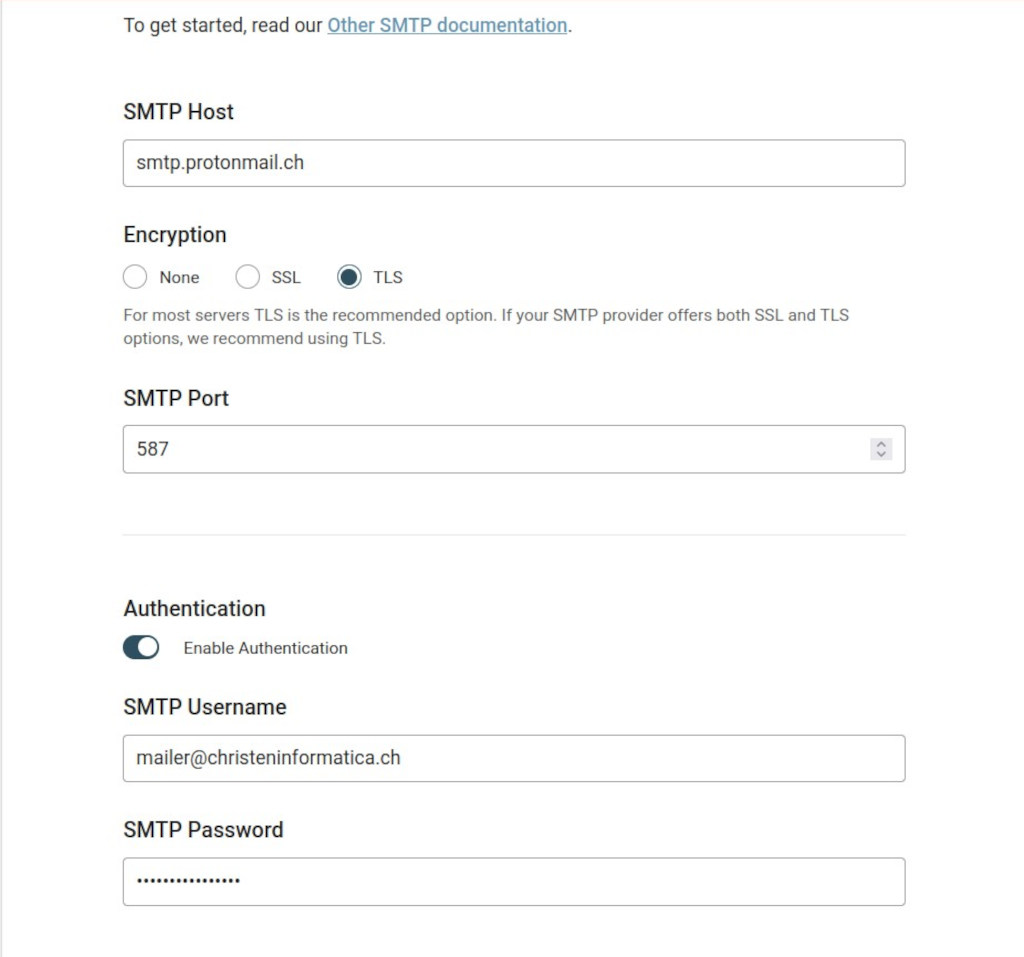
Now, you use smtp.protonmail.ch as the SMTP Server, choose TLS as Encryption method, use the email you created as user and the token you generated as password.